Our Drupal system will automatically create a URL for all of the content on your website based on the title of your page—for pages on communications.uoregon.edu they would be communications.uoregon.edu/page-title-here.
Occasionally you may find that a URL is too long or you need to change the URL to make it easier to remember. In cases like this you can change and customize the URL for your web page.
Create Custom URL Aliases
- Go to the edit screen on the page you want to change or customize the URL
- At the bottom of the edit screen, click on the URL alias settings title
- By default, the "Generate automatic URL alias" box is checked and the URL will be based on the title of the page.

- To make your own custom URL or change the default URL:
- Uncheck the "Generate automatic URL alias" box
- Type in the new URL in the URL alias box
- DO add a slash (/) at the beginning (but NOT at the end)
NOTE: Older versions of Drupal (like Drupal version 7) DO NOT need the slash at the beginning of the URL alias - DO NOT use special characters (&, @, !, %)—use only letters, numbers, and dashes
- DO NOT use acronyms—if you need a shorter URL, acronyms work better for redirects going to your page
- DO NOT put spaces between words—use one word (like: title) or dashes (your-page-title) instead of spaces (your page title)
- DO add a slash (/) at the beginning (but NOT at the end)

URL Redirects
Occasionally you may need to add a redirect to a page instead of changing the URL alias, such as when migrating content from one page to a new page, or when you have redesigned your site and you want to make sure that an old page on your original site will go to the correct page on your new site. You may also need to create a URL redirect so that the page URL is easier to remember for users or if you need a shorter URL for a printed flyer.
Note: When adding a URL redirect, please make sure that the URL you want to use is not already being used. This can be done by typing in the the desired URL into your browser address bar to make sure it takes you to a "page not found" and not to a page that is already published.
Adding a redirect to a page can be done while you are editing that page. When editing your page, at the bottom is a "URL Redirects" tab:
Click the title and then click on the "Add URL redirect" button:

On the next page you can then paste in the URL of the original page into the "From" field and click the "Save" button at the bottom to activate the URL redirect.
NOTE: Make sure you do not copy over a / to the beginning of the "From" field or it will break the URL redirect. The "From" field should be everything after the .edu/ from your old page's URL
In the example below there is the original page URL "digital.uoregon.edu/Old-Page" that will be redirected to an updated page which has the URL of "/node/330". Note the / at the beginning of the "To" URL for Drupal 8+ versions:

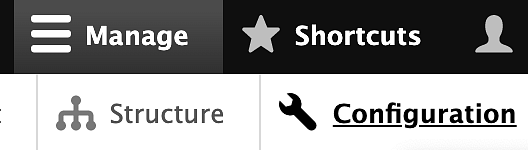
Redirects can also be created from the Configuration admin page, located in the top "Manage" shortcuts:
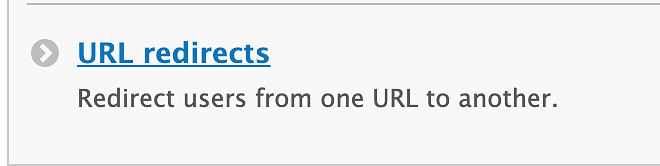
From there, you can click on the URL Redirect link and fill out the from URL and the to URL paths just like the examples above.
URL Redirect Issues
Occasionally you may find that URL redirects or aliases you have created for your content do not work as expected. These issues can often be most visible when the URL redirect goes to an external site or page.
- If a URL redirect is not working as expected:
- Try different browsers and verify that the redirect does not work when using an "incognito" or "private" browser window, as sometimes redirect issues are caused by browser caching and when editors of a site are logged in it can sometimes bypass redirects.
- Double check existing redirects that are currently going to or from that page or node item.
- Look at the "Path" URL of the redirect (the departure URL that users will come from) and make sure it is not currently being used as the "URL Alias" for the page being redirected, or any other published and unpublished pages on the site.
NOTE: Any URL that is in the "Path" URL field, and is still attached to an unpublished page, can prevent redirects from occurring. - Look at the "To" URL of the redirect (the destination URL where you want users to arrive) and make sure it is not also being redirected. This can have the potential to cause a redirect loop which will prevent users from reaching the content
- Note: Both redirect loops (page A to B to A) and long "chains" of redirects (page A to B to C to D) have the potential to cause damage to your site's SEO rankings and make it difficult for site users to find your content so both should be avoided.
- Look at the "Path" URL of the redirect (the departure URL that users will come from) and make sure it is not currently being used as the "URL Alias" for the page being redirected, or any other published and unpublished pages on the site.
- NOTE: For redirects going to an external page (any URL that is not on your site) completely removing all old URL aliases might also be necessary. Just unpublishing the page may not be enough as visitors to the old page could still end up seeing either a "page not found" message or the wrong content.
If you have double checked your redirects and aliases but still have redirect issues, please submit a help ticket so we can troubleshoot the issue.
Batch Redirects
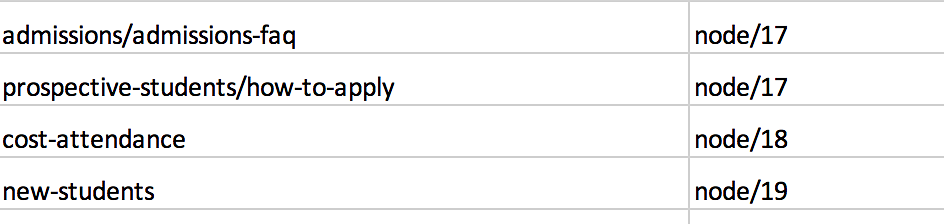
We can also create redirects as a batch process using Excel spreadsheets. If you create a spreadsheet that has the URL of the old page and the new "node" number of the page it should go to, you can send the file to us and we can run a batch import.
NOTE: The batch process should be used only for when you have lots of redirects to create. If you have less than 10 redirects, it is easier to do them one by one than as a batch.
An example URL redirect spreadsheet with the old site to the new node pages is shown below: